Dragon Bridge
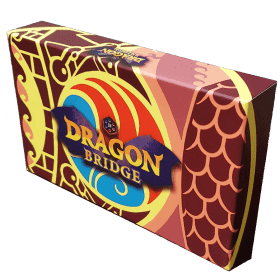 Em Dragon Bridge, cada jogador controla um mago, movendo-se para cima e para baixo em uma grade de 18x1, lançando feitiços, ganhando itens mágicos e atraindo o dragão para um lado ou outro.
Os jogadores vencem jogando o outro jogador no Dragão ou escapando.
Número de jogadores: 2
Duração do jogo: 10 mn
Complexidade: 3 / 5
Jogue Dragon Bridge e 1257 outros jogos online.
Sem downloads, direto no seu navegador.
Com seus amigos e milhares de jogadores do mundo inteiro.
Grátis.

Jogue Dragon Bridge e 1257 outros jogos online.
Sem downloads, direto no seu navegador.
Com seus amigos e milhares de jogadores do mundo inteiro.
Grátis.

Sumário de Regras
DRAGON BRIDGE
This is a quick 2-player competitive game set in the Gem Wizards universe. You and the opponent, both controlling Wizards, are trapped on a bridge, and a Dragon is circling you. The object of the game is to either escape, or push the opponent into the Dragon.
NEST
The Dragon Nest is an area next to the board where played cards go. As players play, it is suggested that you use the Nest board so that it is clearly visible when the seventh card is played there (which is important for the Dragon Check phase, which we’ll discuss later). Each player should also have space on the table for items they may gain throughout the match (which we will sometimes call your “tableau”). Your first matches... The first time you play, you may want to play the Basic Game. There are two simple changes you make for the Basic Game: completely ignore all Wizard powers, and instead of taking items from the Market, draw them blindly from the item deck to your tableau. Also, before starting play, put all of the cards with a white gem on their top right corner back into the box—these are the Bridge Hacking Expansion cards. It is recommended that you play a few matches with the base game before bringing in these cards.
TURN STRUCTURE
• ACTION PHASE: Play an Action Card. • GEM PHASE: Use a Gem, buy an item, or Ready a Gem • DRAGON CHECK: Check for FLIGHT or ROOST. • DRAW: Draw until you have four cards in hand.
PLAYING ACTION CARDS
To play an action card, place a card from your hand face-up in front of you and resolve its action as described on the upper text box area of the card (the lower orange section that exists on some action cards is called the Dragon section and its power would only activate if this card causes a FLIGHT) After resolving, place the card in the Dragon Nest (read more in the “Dragon Check” section).
GEM PHASE
On the Gem Phase, you may perform one Gem Action: • Play a Green Gem: You may play one READY (face-up) Green Gem, by flipping it face down and resolving its action.
• Ready a Green Gem. You may flip one face-down (DEPLETED) Green Gem face up. This is only available while you are standing on a Gem Tile ( ) • Gain an Item. You may DEPLETE (flip facing down) 3 READY Green Gems to Gain an Item. Take one of the face-up Items next to the Item Deck and place it in front of you (or in the basic game, draw an Item from the Item Deck). Its powers are now available to you for the rest of the game (usually). • Play a Bridge Hack (If playing with the BridgeHacking Expansion only). You may play a Bridge Hack card by paying the required number of White Gems back to the supply and performing the action as described on the Bridge Hack card (the Bridge Hack typically stays where it is after being played).
DRAGON CHECK
To make a Dragon CHECK, do the following: 1. COUNT DRAGON ORBS: Some Action Cards have 1, 2 or 3 Dragon Wings on the bottom section. If there are 9* or more visible Dragon Wings in the Nest, perform a Dragon FLIGHT (see below). 2. COUNT CARDS: In the case that you do not perform a FLIGHT, if there are 7 or more cards in the Nest, shuffle them all back into the deck. Then draw 1 card from the Action deck, face up, to the Nest. This is called a Dragon ROOST, which typically doesn’t change anything except for resetting the Nest (although some character and item powers activate on Roost).
- 9 is the default number, but it may become modified
by Dragon or other powers.
DRAGON FLIGHT
The Dragon Flight is an important event which changes the side of the map that the Dragon is on. Follow these steps: 1. The last card played is placed underneath the Dragon card as seen below If there was already one there, shuffle it into the Action deck. This gives the Dragon a new power 2. Shuffle all other remaining cards in the Nest to the Action deck. 3. Take the Dragon and its new power card and move them both to the opposite side of the map. After a FLIGHT or a ROOST, draw items until there are 3 items available in the Market. In this illustration, a Gale Action card became the new Dragon Power. Gale’s Dragon Power modifies the number of Wings needed for the next Flight, so this Dragon is more likely to stay put for a bit longer (good for a character like Derby Pocket or Lori AnnDavis, who both benefit from ROOSTs). Note that there can only ever be one Dragon Power underneath the Dragon.
MATCH END
The five orange tiles (end tiles), at either end of the Bridge are considered: • Exit tiles if the Dragon is not adjacent to them. If you MOVE ( ) while you are standing on an Exit Tile, you have ESCAPED and win the match. (You must typically start your turn on an Exit Tile to win in this way; use of the “Step” or some character powers may be exceptions in some cases.) • Theatened tiles if the Dragon is adjacent to them. If you end your Gem Phase while standing on a threatened tile, you get POUNCED and lose the match. The game ends immediately when either one of these conditions are met. Please note that a player only wins or loses a match of Dragon Bridge while it is their turn.
MOVING and BUMPING
When a card says MOVE, it means you may move your character up to that many spaces (including zero spaces, if you prefer) in any direction. If you have any bonuses (i.e. from Items or a Wizard power) add that to the total number of spaces you may move. When a card says BUMP, you move the opponent’s Wizard exactly that many spaces (or, as far as you can go if you’ve hit the end of the map) in any direction. You may choose to use bonuses from a Item or Wizard Power, but if you do, you must BUMP the full amount possible. If you’re playing with the Bridge Hacking Expansion cards, any time you perform a BUMP, gain 1 White Gem from the supply (place it anywhere on your tableau). If there are none in the supply, take one from the opponent instead. Note that some Items or Wizard Powers only allow you to add the bonus if moving or bumping in a particular direction (such as “away from center”).
TELEPORT
TELEPORT is very similar to MOVE, but it is not modified by the MOVE icon, (it has its own icon, ). Importantly, it does not trigger the win condition. Like MOVE, you can move any amount up to that number of spaces.
WIZARD POWERS and ITEM POWERS
Each Wizard has a passive power that triggers when certain conditions are met. Item powers and Wizard powers work similarly to each other. Many give a bonus to BUMP or MOVE which can be used any time you BUMP or MOVE respectively, and some have specific actions that you may take when certain conditions are met. Powers listed on Item and Wizard cards are optional, unless they are in red text, in which case they are mandatory. See the Icon Guide and Other Notes for more details.
ICON GUIDE
+BUMP. Add 1 to the total (exact) BUMP. +MOVE. Add 1 to the max MOVE. +TELEPORT. +1 to the max TELEPORT. READY a GEM. Flip a face-down Green Gem face up. DEPLETE a GEM. Flip a face-up Green Gem face down. Dragon Wing. These are tallied in the Dragon Check to determine FLIGHT/ROOST.
OTHER NOTES
- When you MOVE or BUMP, you choose a direction first, and then MOVE or BUMP that many tiles in that direction (you cannot execute a BUMP 2 by moving the opponent 1 tile forward, 1 tile back.) - MOVE Example: when you play a card that has MOVE 3, and have the Roller Skates item and are moving away from the center, you may choose to add 2 to the total amount (5). You can then move 0 to 5 tiles in either direction. This is all considered a single MOVE action. Note that you choose the direction to MOVE (or BUMP) first, and then ALL of the movement happens in that same direction for that action. - Character arrows cannot go “off ” the bridge; they stop at the last tile (0) instead. If you are BUMPED further than the last tile, you deplete 1 Gem instead, as indicated by the icon at the end of the Bridge. - Action Cards’ effects are all mandatory if possible, unless they say “you may”. - Character and Item powers are optional: if one could be triggered, you can always choose not to trigger it. The exception to this is some Character abilities which are printed in RED text. These must always be performed (if possible). Note that once you activate a BUMP bonus on an item or character ability, you must use the FULL bonus; BUMPS are always the maximum length possible, after all chosen activatable powers are activated. - Action cards are added to the Nest after their action is resolved, so cards like Dazzle which have you interact with a card in the Nest cannot target themselves. - If multiple of your powers trigger at the same time (items, character abilities, etc), the current player may choose the order to execute them in. - Both win conditions trigger before Dragon Check. This means that even there would be a FLIGHT this turn, you would not even reach the Dragon Check phase if you won/lost. In other words: the Dragon will not switch sides on the same turn a player wins or loses. - By default, if a character card, item or other power doesn’t indicate who can do the action, it means you (the current player) does the action. - “Away from the center” means that at the start of the BUMP action, the direction must be pointing away from the center, not toward it. If the opponent is on the center tile, both directions are “away from the center”.
Character FAQ
“Gem Action” - Some characters have an ability that they can play as a Gem Action. This means that on your Gem Phase, you have this as another possible action you could take with your Gem Action. You still only play one Gem Action a turn, but this gives you one more thing you could do with that Gem Action. Andromeda Robin - When Andromeda uses her second ability, you place your Green Gems to the side, indicating that neither player can interact with them - Andromeda can’t use them, you can’t or buy items. At the start of each turn, return one to your tableau, READIED. If you are BUMPED while there any gems here, return the top one NOT READIED. You can use this ability even if you don’t have all your Green Gems. Gelf Lanz - For Gelf ’s second power, keep the Gem in the same READY/ DEPLETED status when you use the power. A reminder that if multiple actions happen at the same moment, the current player decides their order. Like Andromeda’s power, you do not control the Gem that you place here until it comes back. Bill Milton - The opponent may give you any Action card that has BUMP as part of its action, after you complete your entire Action. Lori Ann-Davis - “After Roost” means after the entire Roost, so you search the deck after the card is drawn to form the new Nest. Venice Gorn - His second power is usable when Gorn is standing on a Start or Center Tile. Also, his Teleport (like all Teleports, and character abilities) is optional. Abragail - If you start your turn with 1 or 2 READY Green Gems, you get the bonuses for the full turn, regardless of whether you DEPLETE or READY any Green Gems throughout the turn.
